Wee Nip 54
|
Design
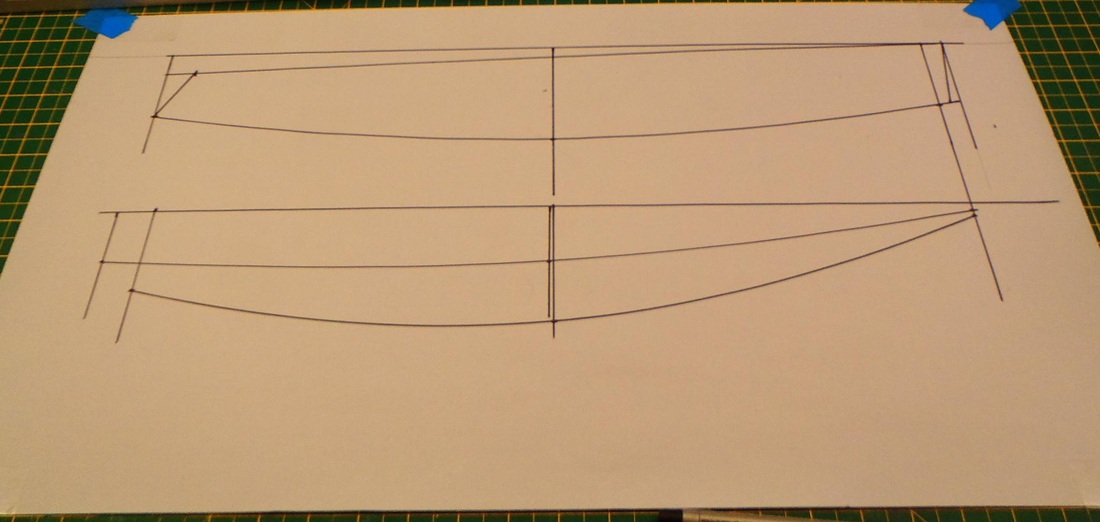
The Wee Nip 54 is a 0.78 scale version of the Abington Park Wee Nip. The fin and bulb are modified to suit the class box. The displacement reduces as a cube of the linier reduction – 1570gms x 0.783 = 745gms Anyone who has built a full size Wee Nip has the skills to build a Wee Nip 54. The first thing is to obtain working drawings of the hull at the reduced scale. One option is to have a copy shop print a reduced copy of the plans but it is quite simple to produce some working drawings. The key dimensions are shown on the hull drawing. The side view bottom, deck and bottom shapes are curves drawn through three points. |
|
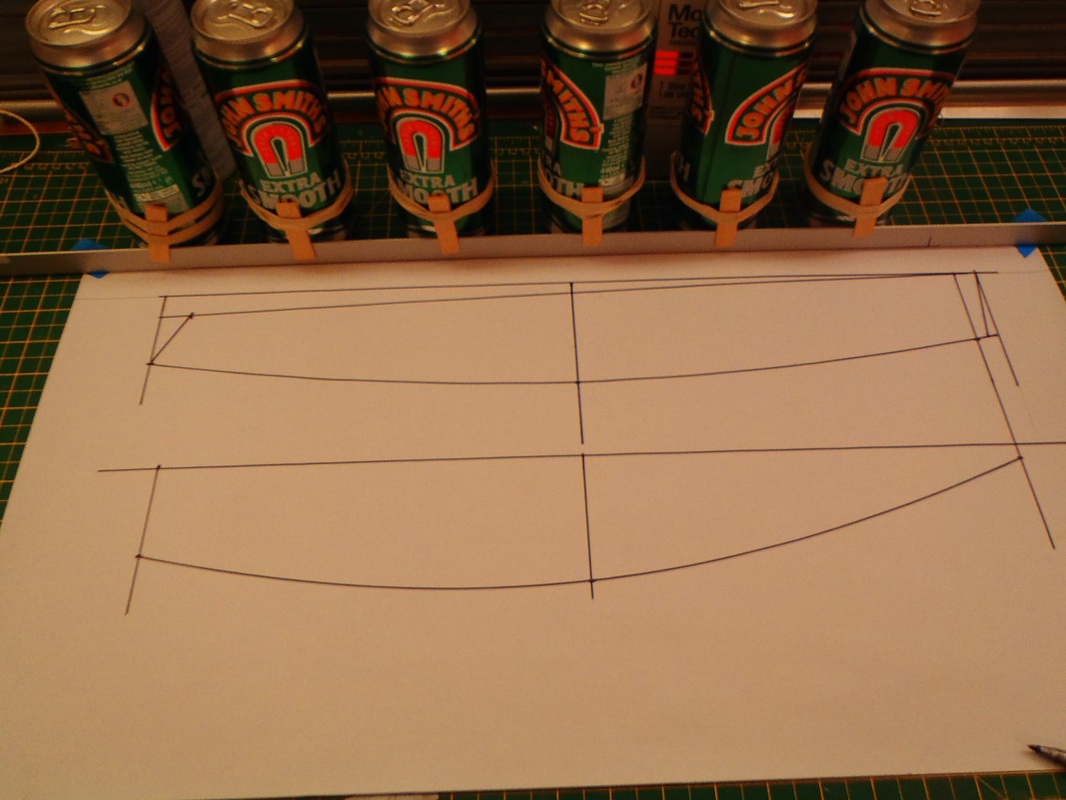
Clip Detail
|
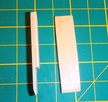
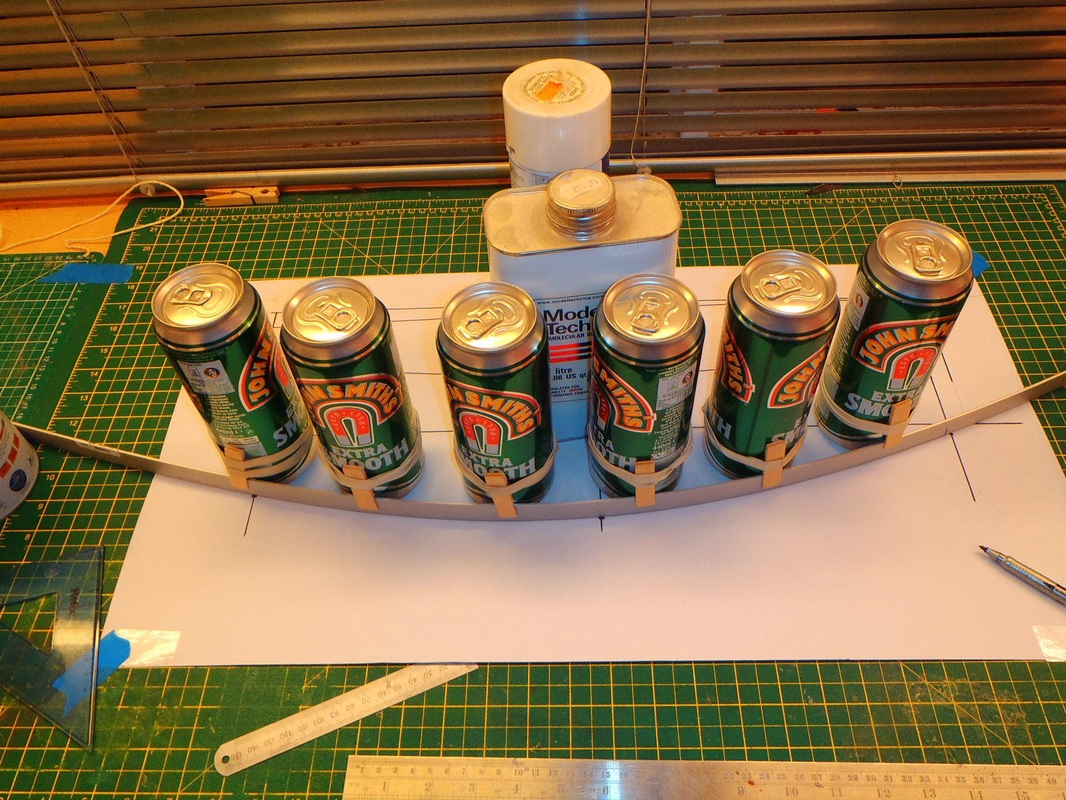
To draw smooth curves I use a strip of aluminium (20x2mm) held in position by various weights (tins). Ply clips held by rubber bands to cans that don’t have seams along the base (e.g. beer tins) hold the strip vertical.
|
As with the full size Wee Nip it is important that the fin and mast are at right angles to the water line, but unlike the full size version you can change the shape if you want to (provided the finished hull fits in the class measurement box). I reduced the beam by 10mm and the width of the stern by 5mm. The bottom shape controls the displacement / water line so it is probably best to leave that alone.
Another key dimension is the distance between the front of the fin and the mast centre line. The centre of pressure of the fin (and hull) should always be in front of the centre of pressure of the sail. The 15mm shown on the plan seems to work well. Moving the fin and mast position rearwards will improve the resistance to diving when running.
Experience with Footys and the Puma 54 suggests a larger than scale rudder is a good idea. The fin can either be 2mm aluminium (as per the standard Wee Nip) or wood (spruce / carbon fibre). Two laminations of 1/16” ply covered in glass cloth would probably work well. I used a 400gm bulb.
The rig can either be a Bermuda as the rig drawing or a swing rig as the Puma 54.
Radio installation internal as the standard Wee Nip or a Cassette. Make cut outs in the deck accordingly.
Build - Hull
Trace or transfer the deck and bottom half shapes onto cardboard and cut the shapes out of 3/32 balsa sheet. Mark the positions of the bulkheads. The bow, front of fin and stern bulkheads are cut by taking the heights from the plan side view and the width from the cut deck and hull bottom. There are various build instructions / pictures on the Wee Nip website. I used 3/32” balsa for the deck and bottom, 1/16” balsa for the sides. The rudder is two laminations of 1/16” balsa either side of a 1/64” ply core sanded to a streamline section.
Build - Rig
The sails are cut from 36 micron polyester film (as the standard Wee Nip). The main sail is approaching the class maximum size. The pictures show the key items on my sails.